How to make a time-lapse video on your Mac?
Today's cameras all have a timelapse mode. However, it is not easy to edit and stitch your photographs into a great time-lapse video. It is to answer this problem that we created GlueMotion. The application provides you with a simple step-by-step interface that will allow you to process as many photos as you need: dozens, hundreds, or even thousands. GlueMotion is a time-lapse app for Mac that spares you the trouble of manual image sorting. Designed for professional use, it also has advanced batch editing, deflickering, and encoding capabilities. Not only does it assemble tons of images into a video, GlueMotion edits and deflickers large photo sequences in no time. We present the tool in this article.
What is GlueMotion, and how it works?
GlueMotion is an application for macOS (11 or later) designed for batch editing and quickly creating time-lapse videos. The program's operation is straightforward and allows any user, amateur or professional photographers, to get started with the tool instantly.
Step 1: Open all your photos simultaneously.
Open the app and click on the plus sign in the top left corner. You must select a folder containing your photos. Some options available allow you to filter files based on their prefix or suffix.
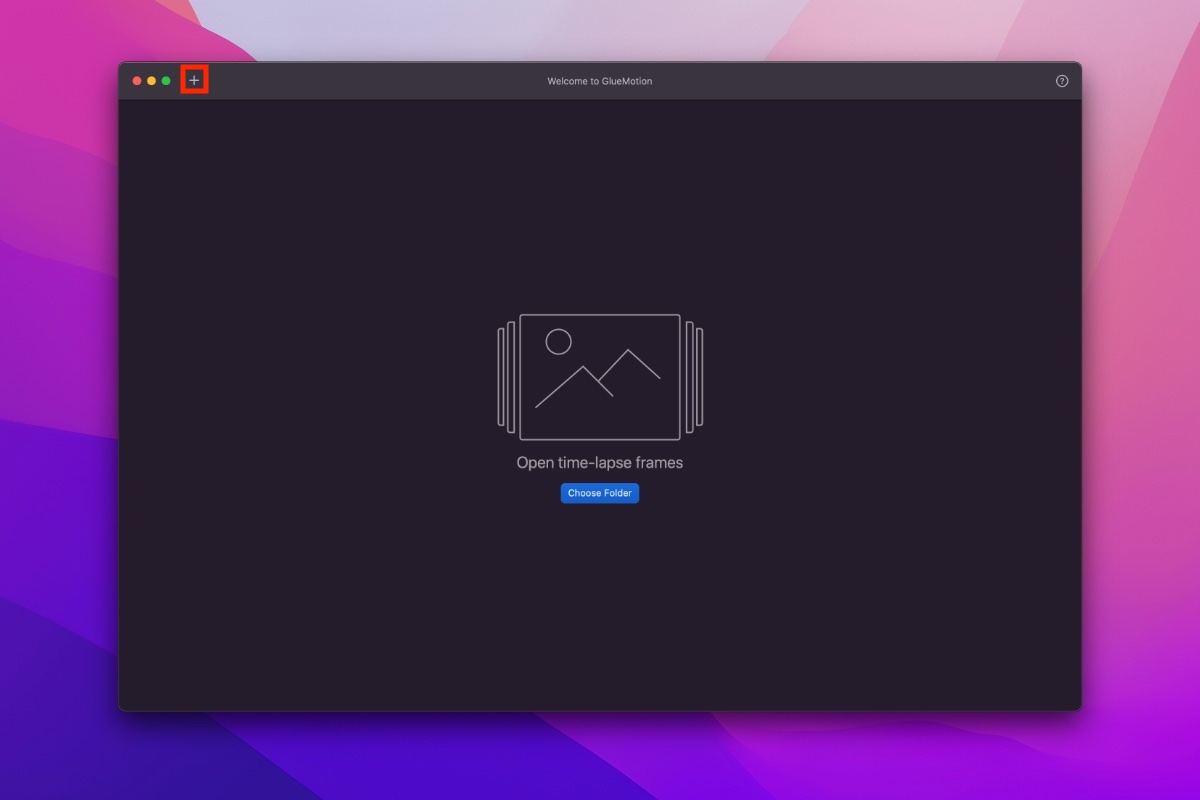
Once the photos are opened, they appear in the main window. You can sort them using the button in the toolbar. Once the photos are imported and sorted, you have to click continue to go to the next step.

Step 2: Batch rotate and crop photos.
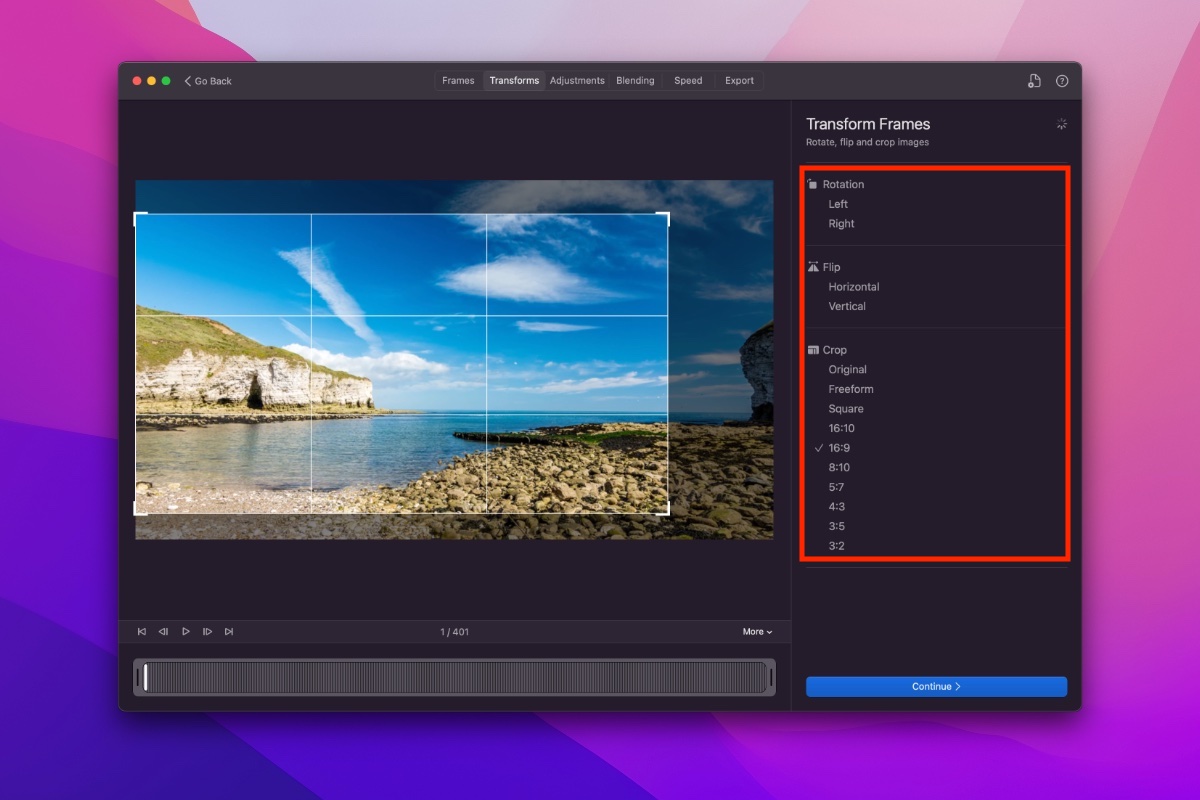
A built-in editor included in GlueMotion helps you polish all images in one go. Any changes you make will apply to all frames in your time-lapse, so that you don't have to do the same things over and over again. The sidebar on the right provides multiple transformation actions. You can rotate, flip, and crop all of your photos. To do it, you just have to activate the corresponding option as shown below. Once the choice has been made, click on continue to go to the next step.
Step 3: Adjust image colors thanks to key-framed filters.
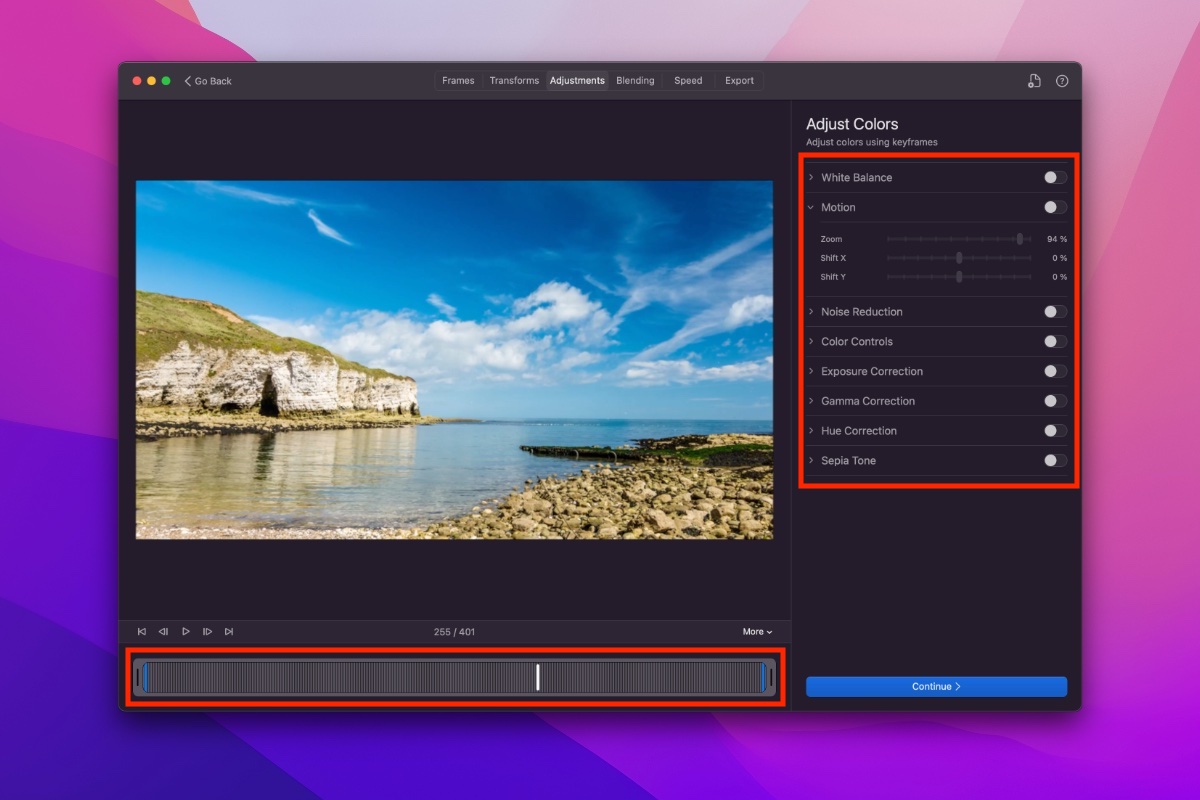
GlueMotion lets you adjust the colors in your photos over time. For this, a set of filters are available in the sidebar. These filters can be activated for the selected frame in the slider. The app will correct your images dynamically by transitioning smoothly between the filters. Again, press the continue button when you are done with your settings.
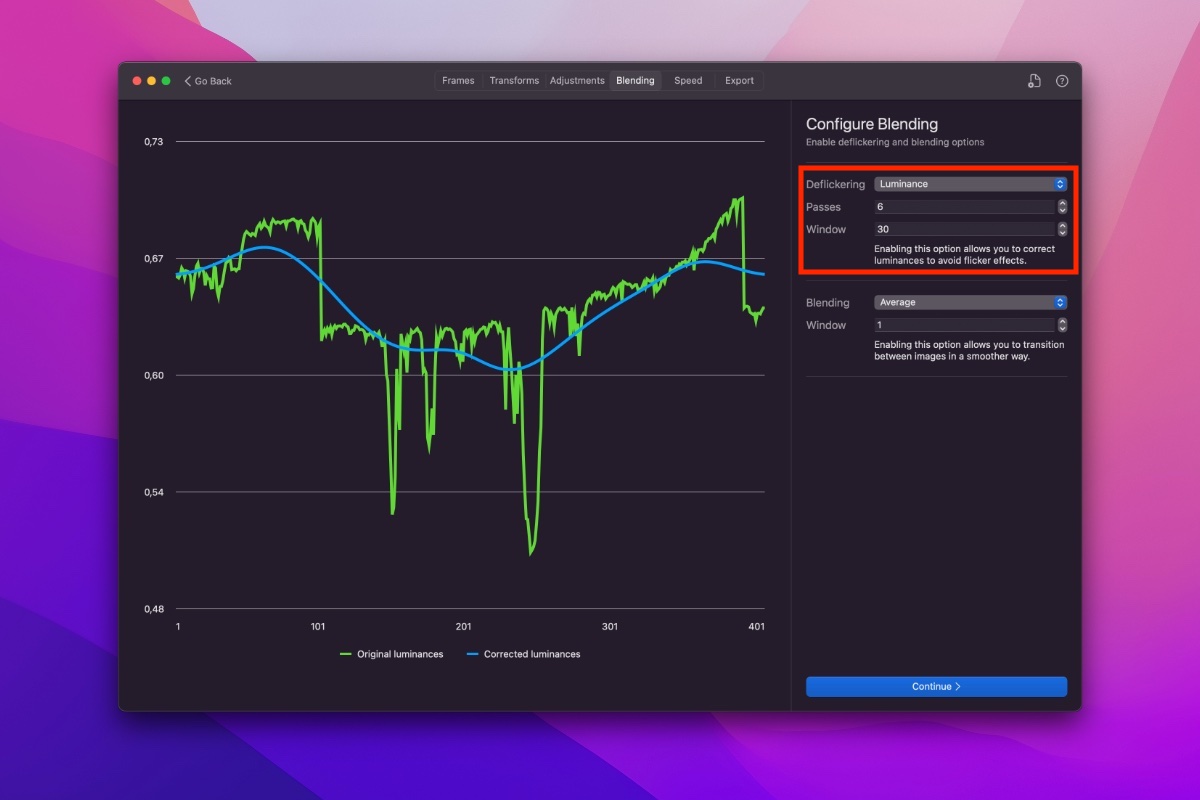
Step 4: Fix video flicker.
The problem that often comes with time-lapse videos is the difference in brightness between images, aka flickering. With GlueMotion, you can get this right with just a few clicks. The application analyzes your images and optimizes brightness for each of them. You don't have to use the command line to perform deflickering. You just need to activate the options in the sidebar. Set them to get the smoothest blue curve possible. Continue to preview all your settings.
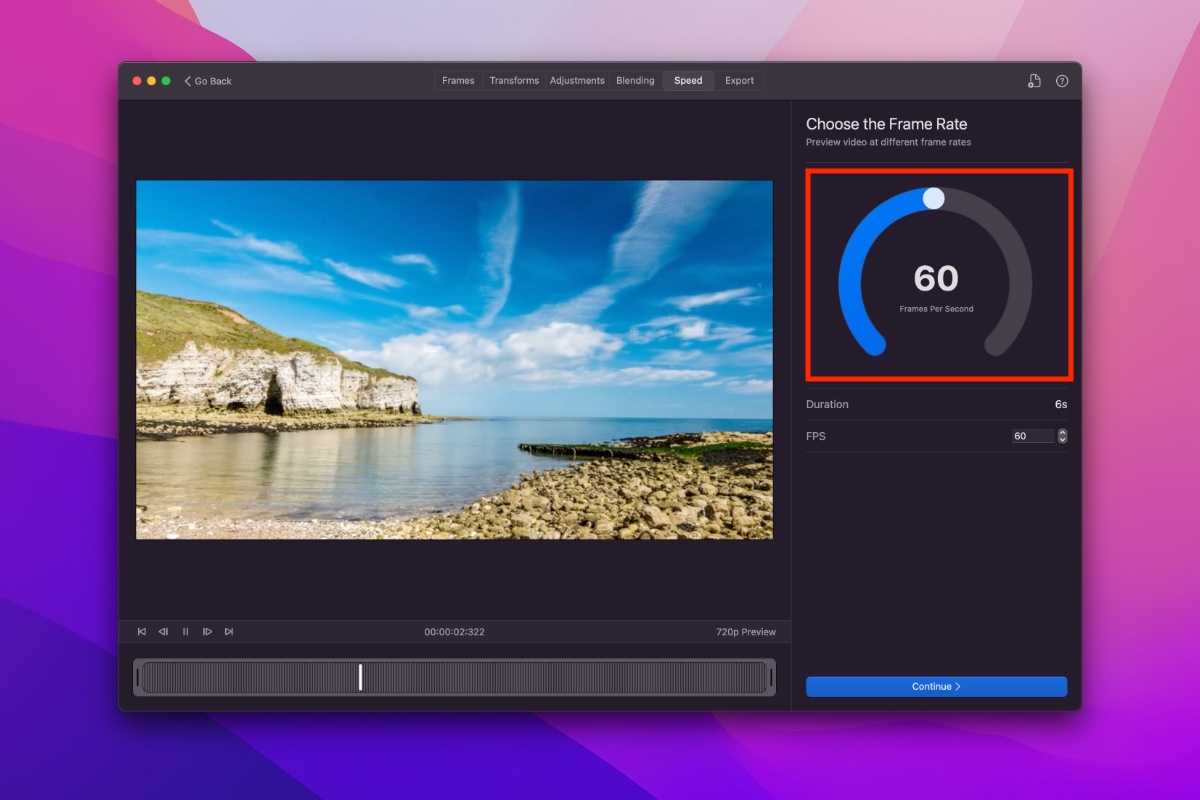
Step 5: Preview and choose frame rate.
Choosing the speed of the time-lapse is a crucial choice. Finding the right speed can even become a nightmare, requiring you to wait for several encodings of the same video at different speeds. GlueMotion avoids this by making it easier for you to generate a preview video whose speed can be changed dynamically. Whether your choice is 30fps, 120fps, or some other value, you just need to move the slider to see the preview at the wanted speed. Press continue for the last time.
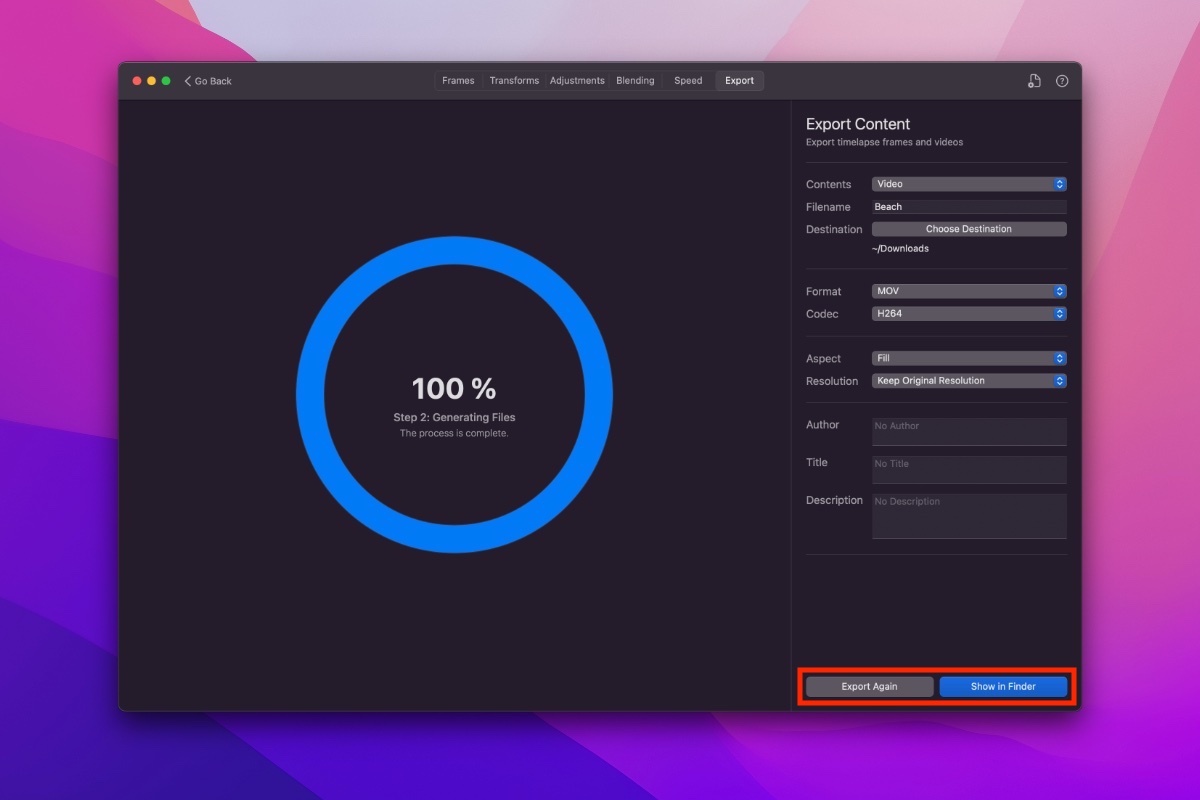
Step 6: Set up video encoding.
At the final stage, select the filename and destination for your time-lapse movie. Then, use the drop-down menus to customize file format and other metadata. You can store videos in MOV, MP4, or M4V and use one of the best video codecs – H.264, Apple ProRes, or HEVC. You can also change the resolution to UHD, 4K, 6K, or even 8K videos.
Effortlessly, you created a professional-quality time-lapse from your RAW files.
Where can I download GlueMotion?
If you want to create a beautiful time-lapse, you need GlueMotion. Thanks to its state-of-art engine, the app is the most efficient solution for professionals. A demo version of the Mac app is available on our website. You can also find the app in the App Store.
Stay in touch
We are working on awesome new projects, subscribe to be notified.