How to create and use presets to sync tags?

We will see how you can use presets to synchronize tags with each other in a few clicks.
To start, you must open the app and the file you want to edit.

Access to presets is done using the bolt button available in the toolbar. Choose Manage Presets from the context menu.

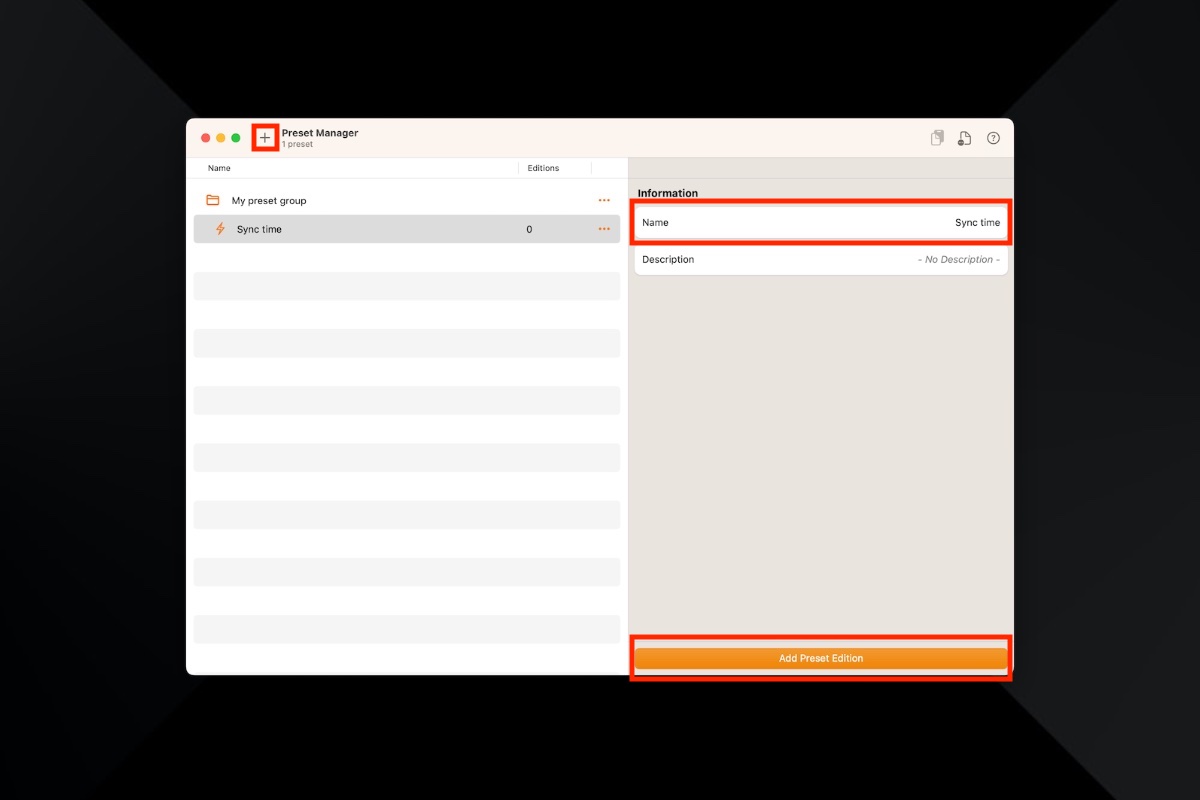
The preset manager appears. This window allows you to create, organize and delete your presets. Click on the plus button to create a new preset. You can change its name by clicking on the corresponding property. At the bottom right, you can add editions to your preset. Click on it.
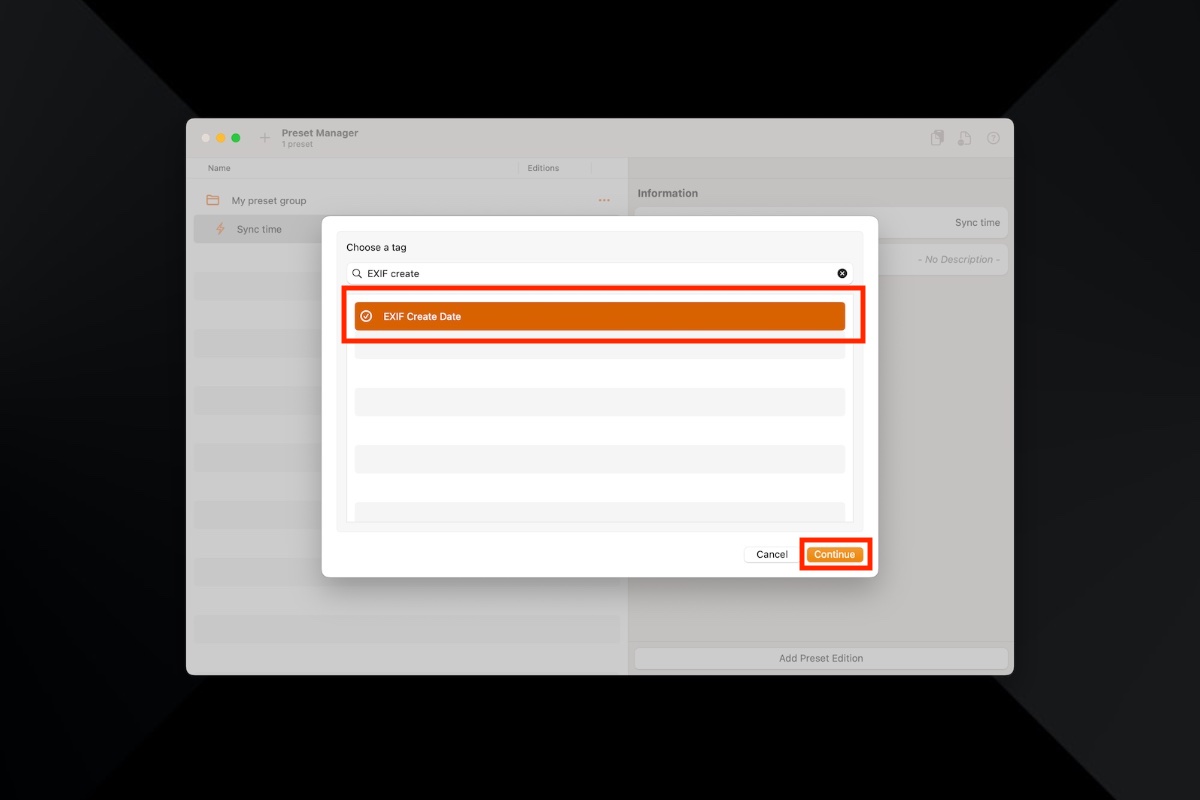
The first step in creating an edition is to choose the tag that will be edited. Search for the desired tag and continue.
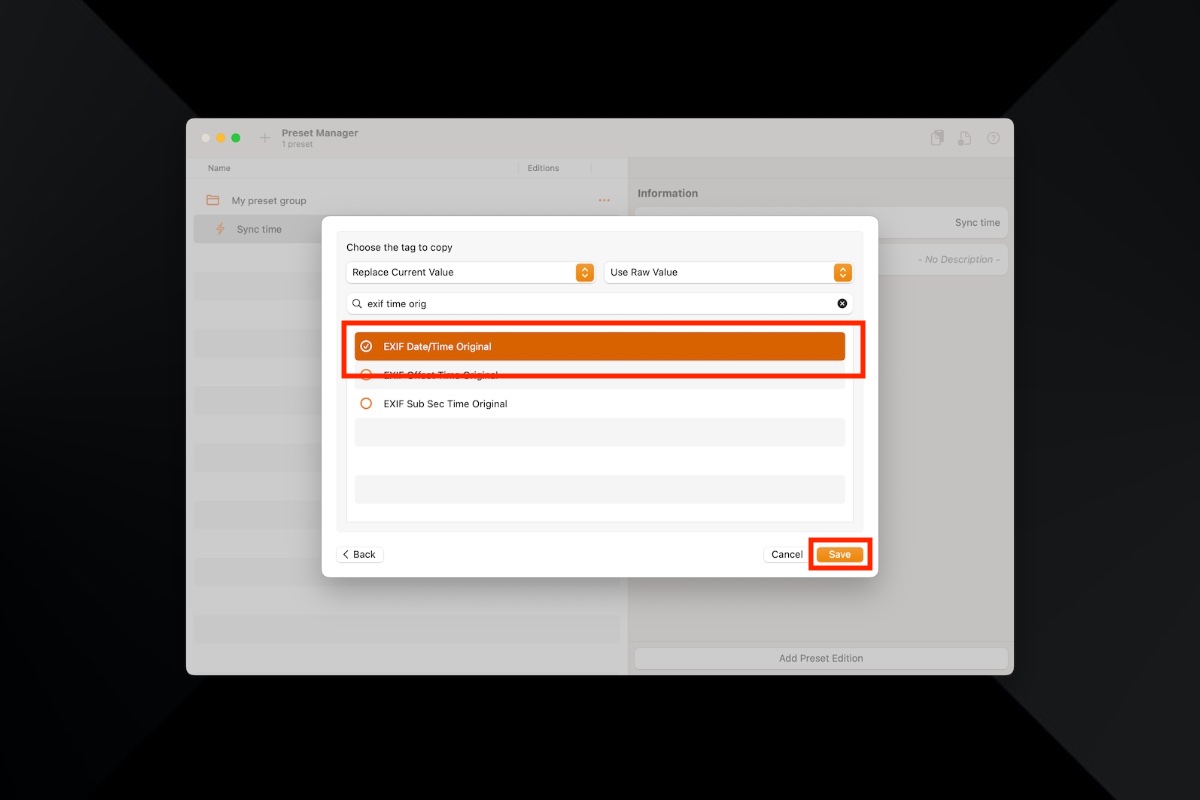
The second step is to choose the action to perform on the selected tag. You can choose to do nothing, erase or modify its value. In our example, we will choose to copy the value of another tag. Again continue after making your choice.

Now you just have to choose the tag to copy, which will be the source of the value. Save your edition.
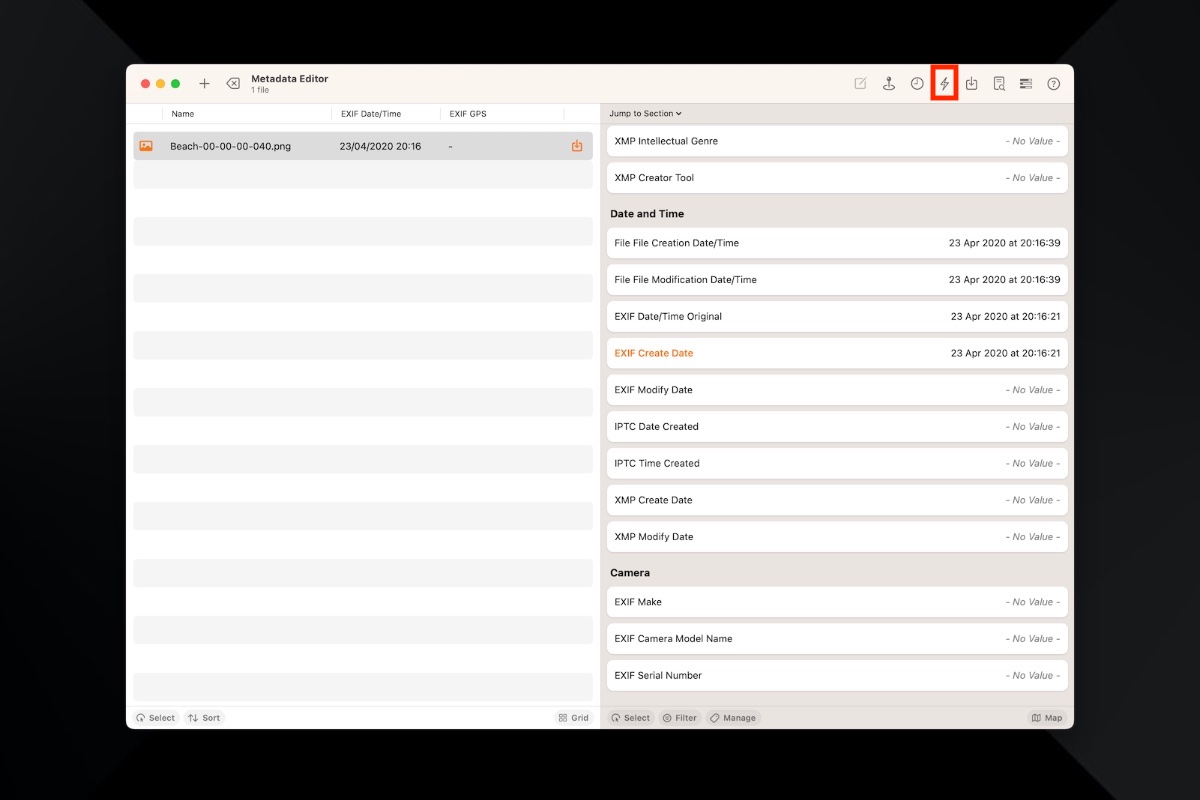
Voila, your preset is created and contains a single edit that will copy the value of one tag to another. You can quickly use the preset using the bolt button on the toolbar.
Stay in touch
We are working on awesome new projects, subscribe to be notified.